월리를 찾아라 학습시키기
Updated:
- 월리를 찾아라
- Info
- Find waldo
- 환경 및 실습
Info
- Dependencies:
- Python 3+
- TensorFlow 2+
- numpy
- matplotlib
- Reference
Find waldo

우리의 추억속(저의 또래에서만?) 월리를 찾아라를 기계학습을 통해 해결해보자. 어렸을 때나 지금이나 눈으로 직접찾는건 정말 어렵네요.
dataset은 4가지로 구성된 .npy 파일
- imgs_uint8.npy: 0~255의 픽셀값으로 이루어진 원본 이미지.
- labels_uint8.npy: 위의 이미지 +월리가 없는 곳은 0, 있는 곳은 255로 채워짐
- waldo_sub_imgs_uint8.npy: 월리가 있는 부분의 장소를 크롭한 장소의 이미지
- waldo_sub_labels_uint8.npy: 위의 이미지 + 크롭된 부분을 255, 밖은 0으로 채워짐
환경 및 실습
- Local, Jupyter Notebook
1. dataset 로드
import numpy as np
import matplotlib.pyplot as plt
import matplotlib.patches as patches
import keras.layers as layers
import keras.optimizers as optimizers
from keras.models import Model, load_model
from keras.utils import to_categorical
from keras.callbacks import LambdaCallback, ModelCheckpoint, ReduceLROnPlateau
import seaborn as sns
from PIL import Image
from skimage.transform import resize

import threading, random, os

# 원본 이미지: 0~255의 픽셀값으로 이루어진 원본 이미지.
imgs = np.load('/Users/a1/bigdata09/find-waldo/dataset/imgs_uint8.npy').astype(np.float32)/255.
# lables: 위의 이미지 +월리가 없는 곳은 0, 있는 곳은 255로 채워짐
labels = np.load('/Users/a1/bigdata09/find-waldo/dataset/labels_uint8.npy').astype(np.float32)/255.
# waldo_sub_imgs: 월리가 있는 부분의 장소를 크롭한 장소의 이미지
waldo_sub_imgs = np.load('/Users/a1/bigdata09/find-waldo/dataset/waldo_sub_imgs_uint8.npy',allow_pickle=True)/255.
# waldo_sub_labels: 위의 이미지 + 크롭된 부분을 255, 밖은 0으로 채워짐
waldo_sub_labels = np.load('/Users/a1/bigdata09/find-waldo/dataset/waldo_sub_labels_uint8.npy',allow_pickle=True)/255.

print(imgs.shape, labels.shape)
print(waldo_sub_imgs.shape, waldo_sub_labels.shape)
2. Data Generate
PANNEL_SIZE = 224

class BatchIndices(object):
    """
    Generates batches of shuffled indices.
    # Arguments
        n: number of indices
        bs: batch size
        shuffle: whether to shuffle indices, default False

    """
    def __init__(self, n, bs, shuffle=False):
        self.n,self.bs,self.shuffle = n,bs,shuffle
        self.lock = threading.Lock()
        self.reset()

    def reset(self):
        self.idxs = (np.random.permutation(self.n)
                     if self.shuffle else np.arange(0, self.n))
        self.curr = 0

    def __next__(self):
        with self.lock:
            if self.curr >= self.n: self.reset()
            ni = min(self.bs, self.n-self.curr)
            res = self.idxs[self.curr:self.curr+ni]
            self.curr += ni
            return res

class segm_generator(object):
    """
    Generates batches of sub-images.
    # Arguments
        x: array of inputs
        y: array of targets
        bs: batch size
        out_sz: dimension of sub-image
        train: If true, will shuffle/randomize sub-images
        waldo: If true, allow sub-images to contain targets.
    """
    def __init__(self, x, y, bs=64, out_sz=(224,224), train=True, waldo=True):
        self.x, self.y, self.bs, self.train = x,y,bs,train
        self.waldo = waldo
        self.n = x.shape[0]
        self.ri, self.ci = [], []
        for i in range(self.n):
            ri, ci, _ = x[i].shape
            self.ri.append(ri), self.ci.append(ci)
        self.idx_gen = BatchIndices(self.n, bs, train)
        self.ro, self.co = out_sz
        self.ych = self.y.shape[-1] if len(y.shape)==4 else 1

    def get_slice(self, i,o):
        start = random.randint(0, i-o) if self.train else (i-o)
        return slice(start, start+o)

    def get_item(self, idx):
        slice_r = self.get_slice(self.ri[idx], self.ro)
        slice_c = self.get_slice(self.ci[idx], self.co)
        x = self.x[idx][slice_r, slice_c]
        y = self.y[idx][slice_r, slice_c]
        if self.train and (random.random()>0.5):
            y = y[:,::-1]
            x = x[:,::-1]
        if not self.waldo and np.sum(y)!=0:
            return None

        return x, to_categorical(y, num_classes=2).reshape((y.shape[0] * y.shape[1], 2))

    def __next__(self):
        idxs = self.idx_gen.__next__()
        items = []
        for idx in idxs:
            item = self.get_item(idx)
            if item is not None:
                items.append(item)
        if not items:
            return None
        xs,ys = zip(*tuple(items))
        return np.stack(xs), np.stack(ys)

def seg_gen_mix(x1, y1, x2, y2, tot_bs=4, prop=0.34, out_sz=(224,224), train=True):
    """
    Mixes generator output. The second generator is set to skip images that contain any positive targets.
    # Arguments
        x1, y1: input/targets for waldo sub-images
        x2, y2: input/targets for whole images
        tot_bs: total batch size
        prop: proportion of total batch size consisting of first generator output
    """
    n1 = int(tot_bs*prop)
    n2 = tot_bs - n1
    sg1 = segm_generator(x1, y1, n1, out_sz = out_sz ,train=train)
    sg2 = segm_generator(x2, y2, n2, out_sz = out_sz ,train=train, waldo=False)
    while True:
        out1 = sg1.__next__()
        out2 = sg2.__next__()
        if out2 is None:
            yield out1
        else:
            yield np.concatenate((out1[0], out2[0])), np.concatenate((out1[1], out2[1]))
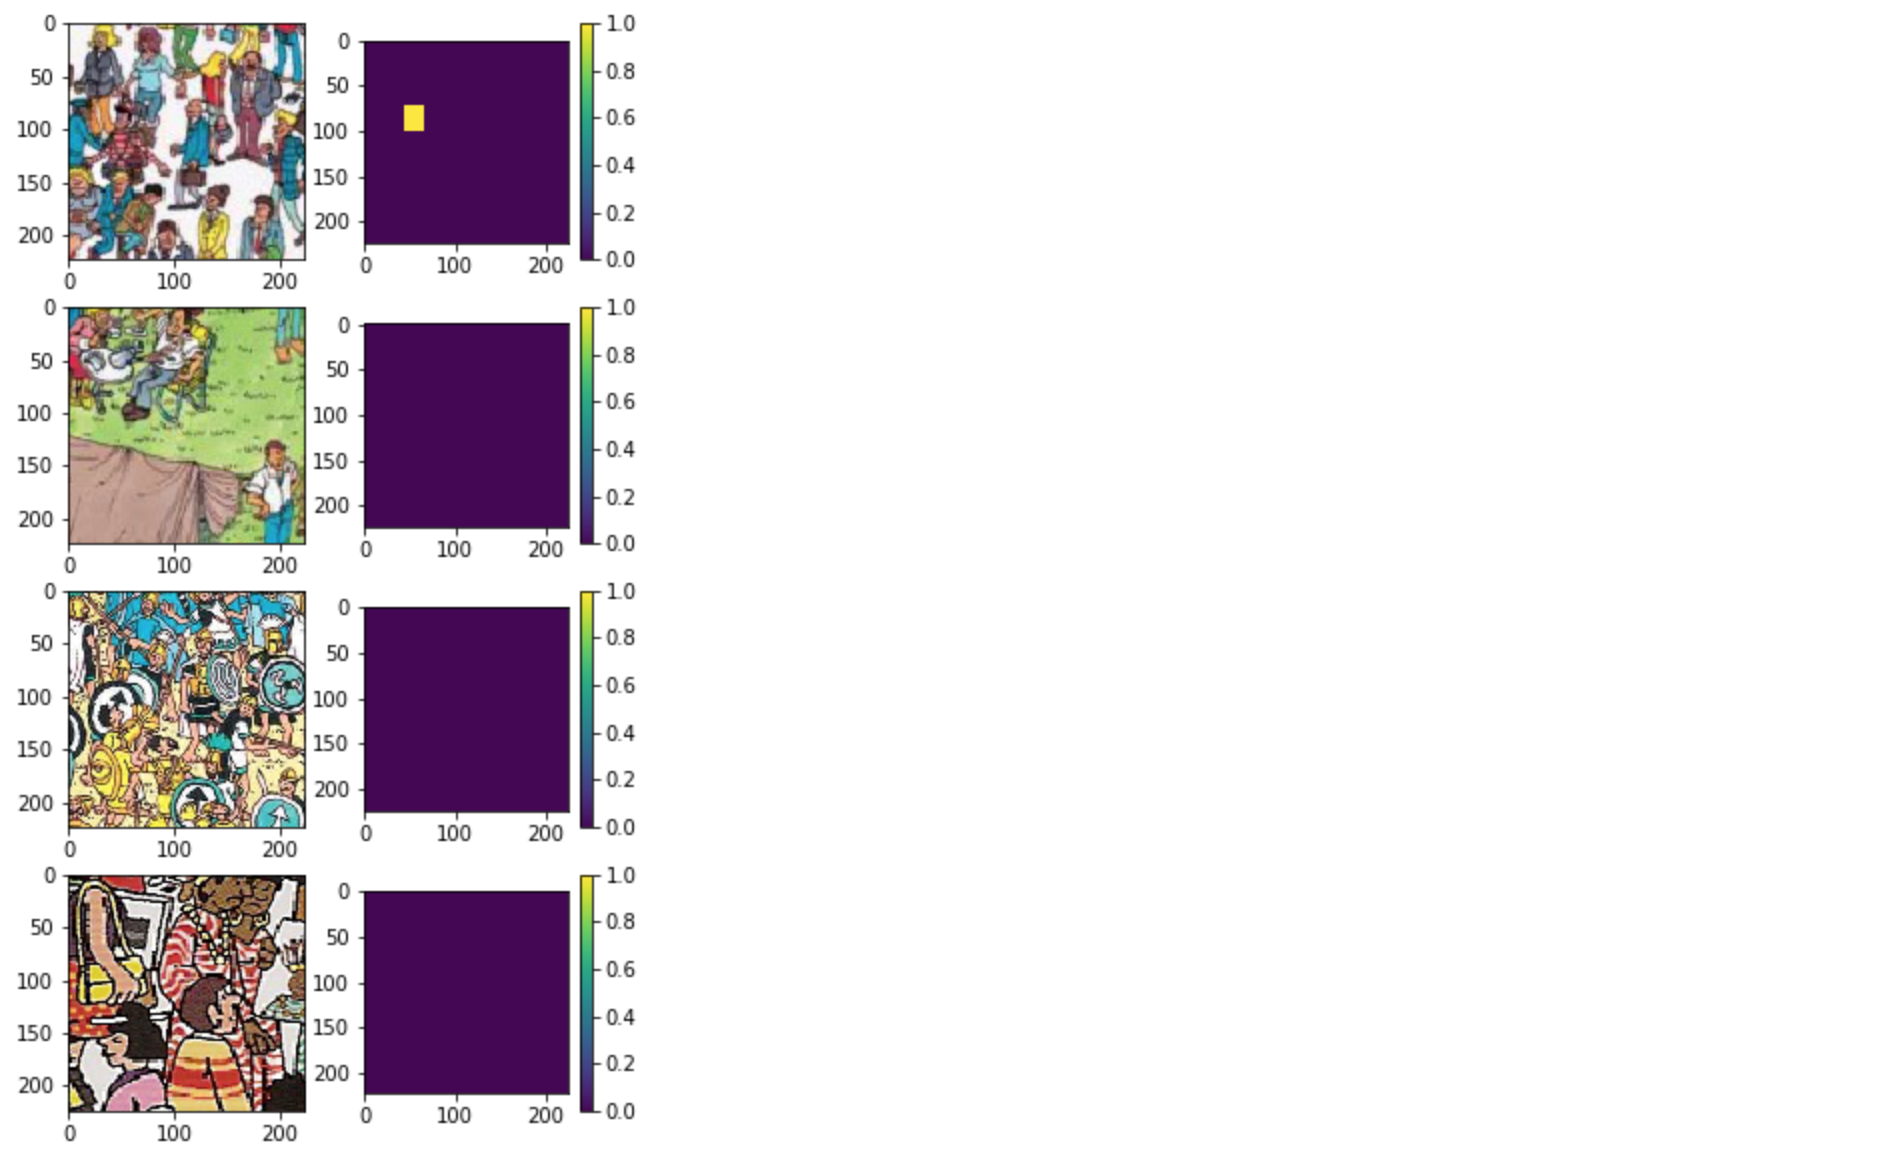
3. Preview
# waldo : not_waldo = 1 : 2 (0.34)
gen_mix = seg_gen_mix(waldo_sub_imgs, waldo_sub_labels, imgs, labels, tot_bs=4, prop=0.34, out_sz=(PANNEL_SIZE, PANNEL_SIZE))

X, y = next(gen_mix)

plt.figure(figsize=(5,10))
for i,img in enumerate(X): # i:0,1,2,3
    plt.subplot(4,2,2*i+1) # 1,3,5,7
    plt.imshow(X[i])
    plt.subplot(4,2,2*i+2) # 2,4,6,8
    plt.colorbar()
    plt.imshow(y[i][:,1].reshape((PANNEL_SIZE, PANNEL_SIZE)))
4. 데이터셋 불균형 문제
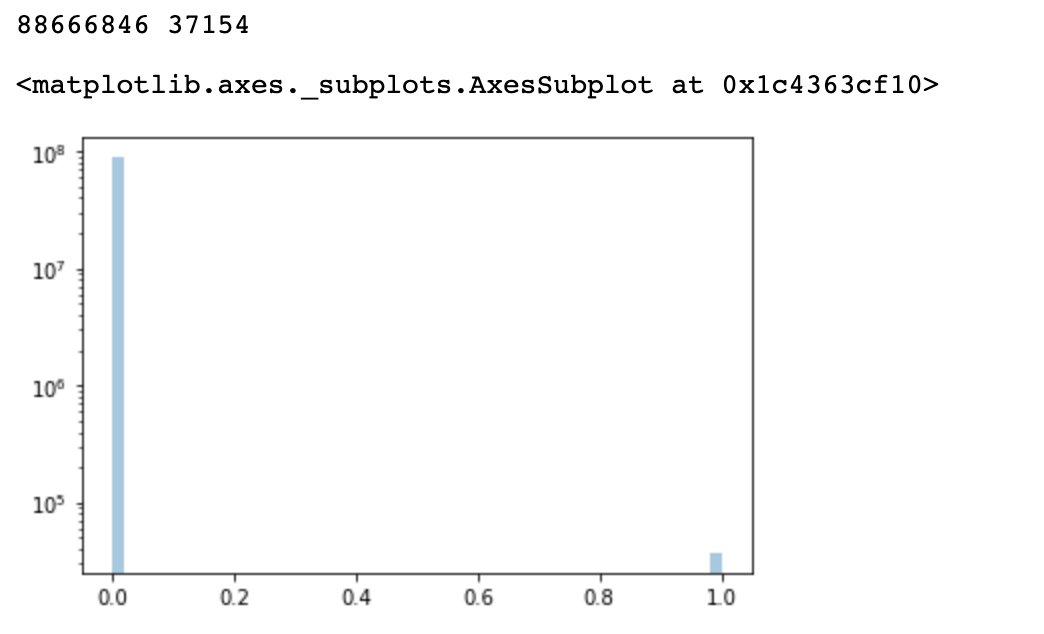
MNIST 예제와 같이 (0~9 손글씨) 각 숫자의 개수가 균형있어야 학습이 잘 되는데 여기서는 월리가 있고 없고의 차이가 극심함
freq0 = np.sum(labels==0)
freq1 = np.sum(labels==1)

print(freq0, freq1)

sns.distplot(labels.flatten(), kde=False, hist_kws={'log':True})
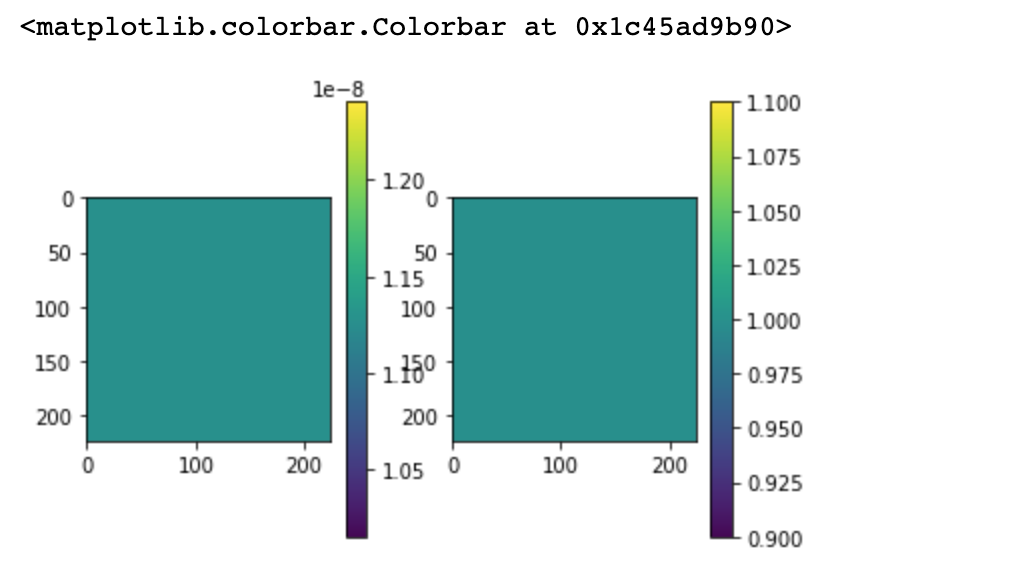
4-1. 데이터 불균형 해결: Class Weights (0,1)
- 모델에게 어떤식으로 아웃풋이 나올 수 있다고 미리 알려주는 것
sample_weights = np.zeros((6, PANNEL_SIZE * PANNEL_SIZE, 2))

sample_weights[:,:,0] = 1. / freq0
sample_weights[:,:,1] = 1.

plt.subplot(1,2,1)
plt.imshow(sample_weights[0,:,0].reshape((224, 224)))
plt.colorbar()
plt.subplot(1,2,2)
plt.imshow(sample_weights[0,:,1].reshape((224, 224)))
plt.colorbar()
5. Create Model
#224*224 크기의 3(컬러이미지)
inputs = layers.Input(shape=(PANNEL_SIZE, PANNEL_SIZE, 3))

net = layers.Conv2D(64, kernel_size=3, padding='same')(inputs)
# net = layers.Activation('relu')(net)
net = layers.LeakyReLU()(net)
net = layers.MaxPool2D(pool_size=2)(net)

shortcut_1 = net

net = layers.Conv2D(128, kernel_size=3, padding='same')(net)
# net = layers.Activation('relu')(net)
net = layers.LeakyReLU()(net)
net = layers.MaxPool2D(pool_size=2)(net)

shortcut_2 = net

net = layers.Conv2D(256, kernel_size=3, padding='same')(net)
# net = layers.Activation('relu')(net)
net = layers.LeakyReLU()(net)
net = layers.MaxPool2D(pool_size=2)(net)

shortcut_3 = net

net = layers.Conv2D(256, kernel_size=1, padding='same')(net)
# net = layers.Activation('relu')(net)
net = layers.LeakyReLU()(net)
net = layers.MaxPool2D(pool_size=2)(net)

# MaxPooling으로 4번 축소한 차원을 다시 UpSampling으로 4번 확대
net = layers.UpSampling2D(size=2)(net)
net = layers.Conv2D(256, kernel_size=3, padding='same')(net)
net = layers.Activation('relu')(net)

net = layers.Add()([net, shortcut_3])

net = layers.UpSampling2D(size=2)(net)
net = layers.Conv2D(128, kernel_size=3, padding='same')(net)
net = layers.Activation('relu')(net)

net = layers.Add()([net, shortcut_2])

net = layers.UpSampling2D(size=2)(net)
net = layers.Conv2D(64, kernel_size=3, padding='same')(net)
net = layers.Activation('relu')(net)

net = layers.Add()([net, shortcut_1])

net = layers.UpSampling2D(size=2)(net)
net = layers.Conv2D(2, kernel_size=1, padding='same')(net)

# 1*224 모양의 2개의 채널을 합쳤을 때 1이 나오도록.
net = layers.Reshape((-1, 2))(net)
net = layers.Activation('softmax')(net)

model = Model(inputs=inputs, outputs=net)

model.compile(
    loss='categorical_crossentropy',
    optimizer=optimizers.Adam(),
    metrics=['acc'],
    sample_weight_mode='temporal' # 위에서 만든 Class Weights를 사용하기 위해 'temporal'로 지정.
)

model.summary()
6. Train
gen_mix = seg_gen_mix(waldo_sub_imgs, waldo_sub_labels, imgs, labels, tot_bs=6, prop=0.34, out_sz=(PANNEL_SIZE, PANNEL_SIZE))

def on_epoch_end(epoch, logs):
    print('\r', 'Epoch:%5d - loss: %.4f - acc: %.4f' % (epoch, logs['loss'], logs['acc']), end='')

# 깔끔한 출력확인을위해 LambdaCallback 함수 사용
print_callback = LambdaCallback(on_epoch_end=on_epoch_end)

history = model.fit_generator(
    gen_mix, steps_per_epoch=6, epochs=500,
    class_weight=sample_weights,
    verbose=0,
    callbacks=[
        print_callback,
        ReduceLROnPlateau(monitor='loss', factor=0.2, patience=100, verbose=1, mode='auto', min_lr=1e-05)
    ]
)

model.save('/Users/a1/bigdata09/find-waldo/model.h5')

plt.figure(figsize=(12, 4))
plt.subplot(1, 2, 1)
plt.title('loss')
plt.plot(history.history['loss'])
plt.subplot(1, 2, 2)
plt.title('accuracy')
plt.plot(history.history['acc'])
7. Evaluate
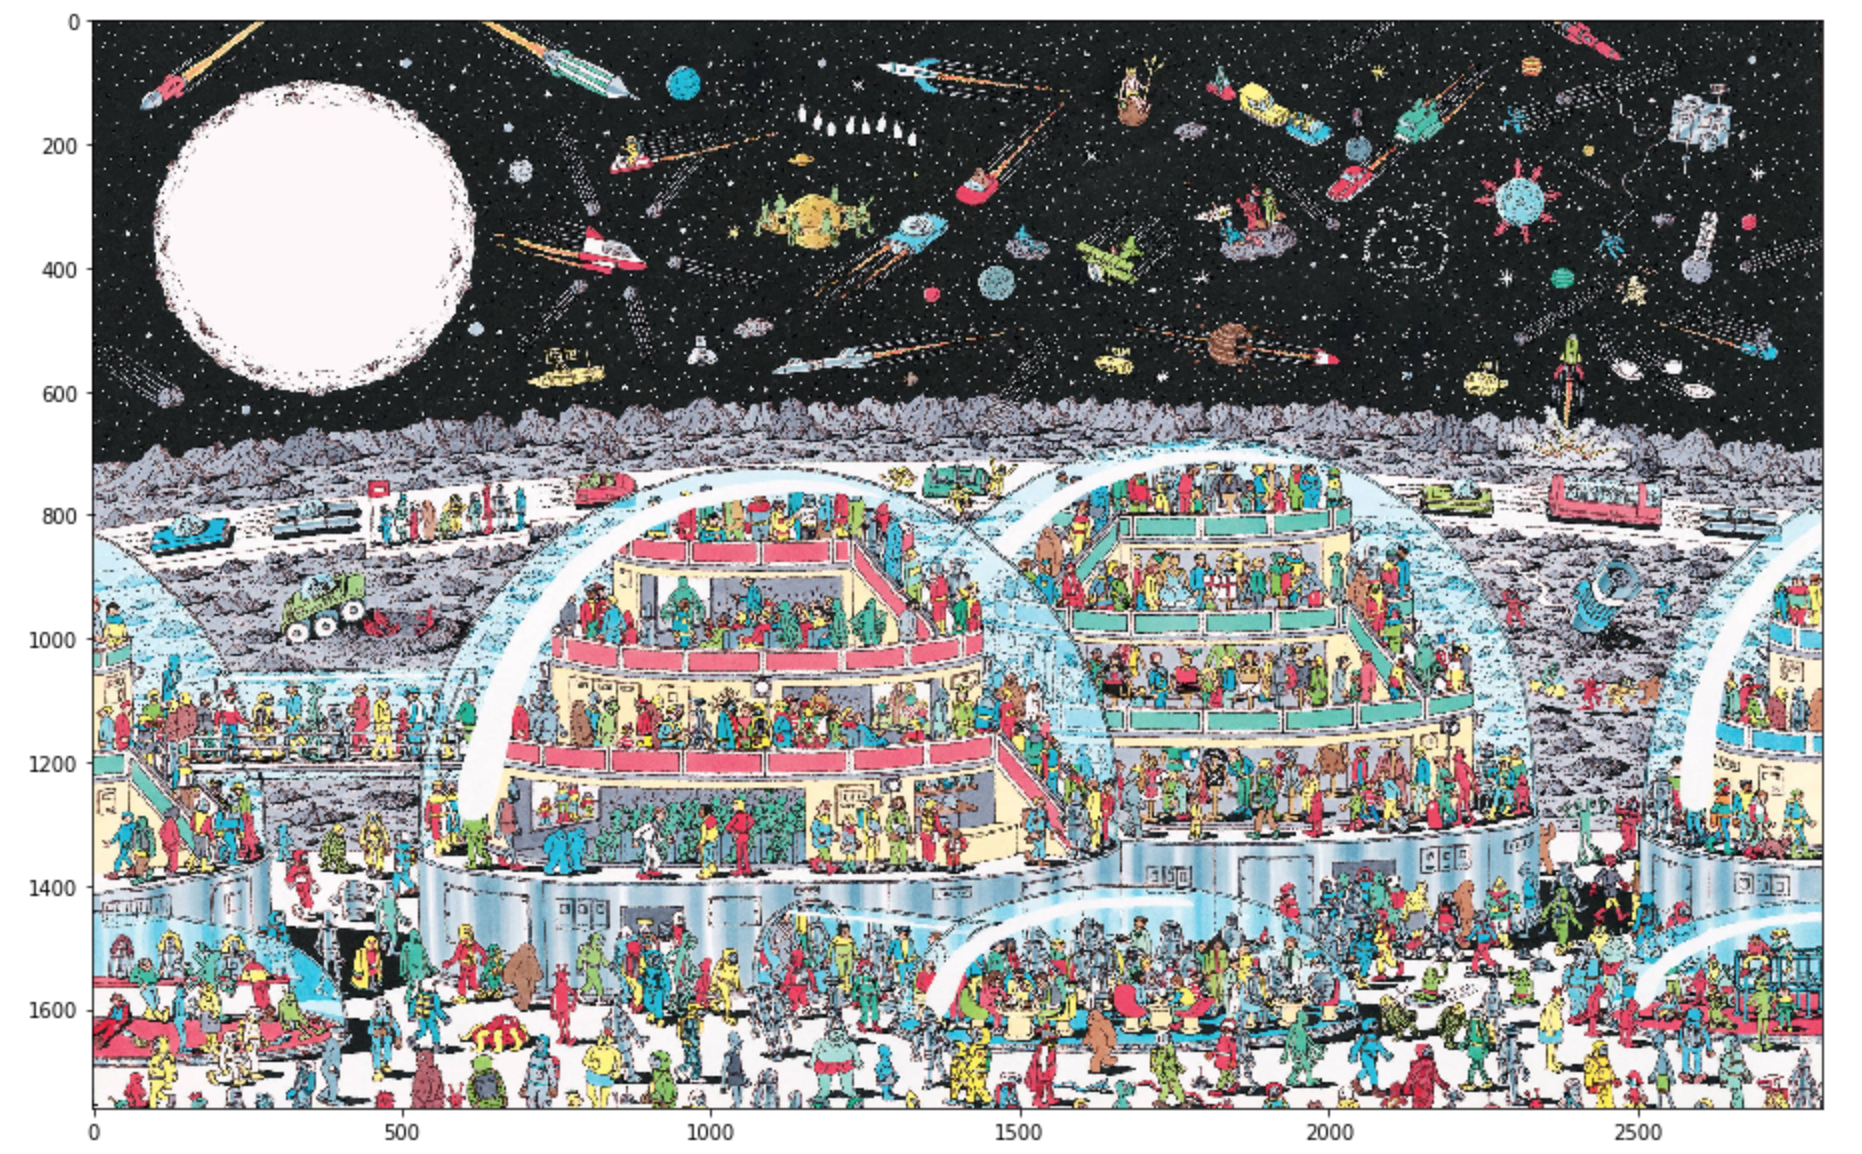
img_filename = '03.jpg'
test_img = np.array(Image.open(os.path.join('/Users/a1/bigdata09/find-waldo/test_images', img_filename)).resize((2800, 1760), Image.NEAREST)).astype(np.float32) / 255.

plt.figure(figsize=(20, 10))
plt.imshow(test_img)
8. Helper Functions (Resize, Split, Combine Pannels)
# 인풋이미지를 자를때 224*224로 균등하게 자르는 함수
def img_resize(img):
    h, w, _ = img.shape
    nvpanels = int(h/PANNEL_SIZE)
    nhpanels = int(w/PANNEL_SIZE)
    new_h, new_w = h, w
    if nvpanels*PANNEL_SIZE != h:
        new_h = (nvpanels+1)*PANNEL_SIZE
    if nhpanels*PANNEL_SIZE != w:
        new_w = (nhpanels+1)*PANNEL_SIZE
    if new_h == h and new_w == w:
        return img
    else:
        return resize(img, output_shape=(new_h, new_w), preserve_range=True)

# 잘린 이미지를 배치로 만드는 함수
def split_panels(img):
    h, w, _ = img.shape
    num_vert_panels = int(h/PANNEL_SIZE)
    num_hor_panels = int(w/PANNEL_SIZE)
    panels = []
    for i in range(num_vert_panels):
        for j in range(num_hor_panels):
            panels.append(img[i*PANNEL_SIZE:(i+1)*PANNEL_SIZE,j*PANNEL_SIZE:(j+1)*PANNEL_SIZE])
    return np.stack(panels)

# 잘린 이미지를 하나로 합치는 함수
def combine_panels(img, panels):
    h, w, _ = img.shape
    num_vert_panels = int(h/PANNEL_SIZE)
    num_hor_panels = int(w/PANNEL_SIZE)
    total = []
    p = 0
    for i in range(num_vert_panels):
        row = []
        for j in range(num_hor_panels):
            row.append(panels[p])
            p += 1
        total.append(np.concatenate(row, axis=1))
    return np.concatenate(total, axis=0)
8-2. Preprocess Image
test_img = img_resize(test_img)

panels = split_panels(test_img)

# test
out = combine_panels(test_img, panels)

print(panels.shape, test_img.shape, out.shape)
9. Predict
model = load_model('/Users/a1/bigdata09/find-waldo/model.h5')

# 1차원*2패널로 나온 결과물을 패널 사이즈에 맞게 리사이즈 후 1개의 채널만 사용(sample_weights에서 2개의 채널에 각각 0,1을 집어넣었기 때문. 둘 중 무엇을 써도 상관은 없다)
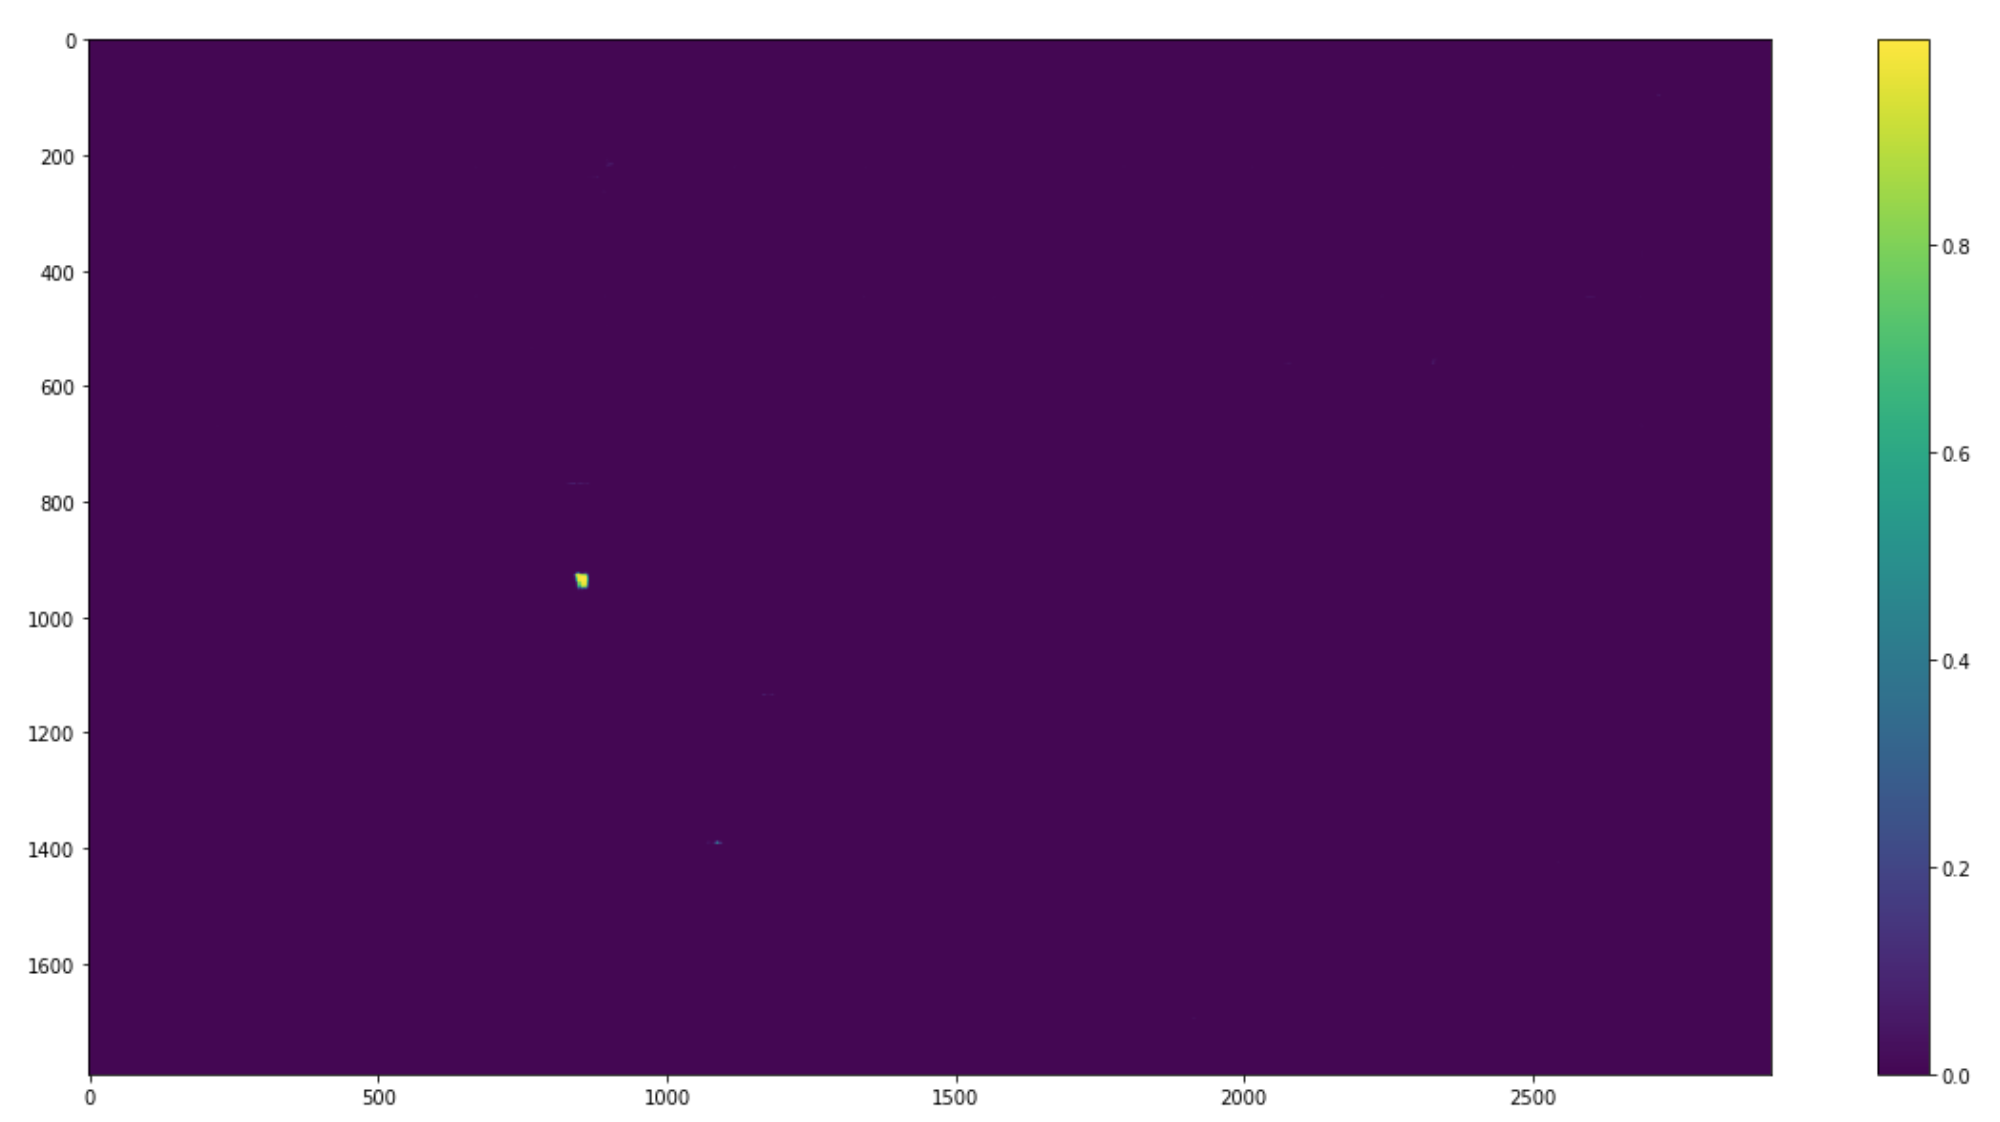
pred_panels = model.predict(panels).reshape((-1, PANNEL_SIZE, PANNEL_SIZE, 2))[:, :, :, 1]

pred_out = combine_panels(test_img, pred_panels)

# compute coordinates and confidence
argmax_x = np.argmax(np.max(pred_out, axis=0), axis=0)
argmax_y = np.argmax(np.max(pred_out, axis=1), axis=0)
confidence = np.amax(pred_out) * 100

print('(%s, %s) %.2f%%' % (argmax_x, argmax_y, confidence))

plt.figure(figsize=(20, 10))
plt.imshow(pred_out)
plt.colorbar()
10. Overlay for Result
월리가 있는 부분만 하얀 색으로 오버레이 (나머지는 어둡게)
def bbox_from_mask(img):
    rows = np.any(img, axis=1)
    cols = np.any(img, axis=0)
    y1, y2 = np.where(rows)[0][[0, -1]]
    x1, x2 = np.where(cols)[0][[0, -1]]
    return x1, y1, x2, y2

x1, y1, x2, y2 = bbox_from_mask((pred_out > 0.8).astype(np.uint8))
print(x1, y1, x2, y2)

# make overlay
overlay = np.repeat(np.expand_dims(np.zeros_like(pred_out, dtype=np.uint8), axis=-1), 3, axis=-1)
alpha = np.expand_dims(np.full_like(pred_out, 255, dtype=np.uint8), axis=-1)

overlay = np.concatenate([overlay, alpha], axis=-1)

overlay[y1:y2, x1:x2, 3] = 0

plt.figure(figsize=(20, 10))
plt.imshow(overlay)

11. Final Result
최종 결과물
fig, ax = plt.subplots(figsize=(20, 10))

ax.imshow(test_img)
ax.imshow(overlay, alpha=0.5)

rect = patches.Rectangle((x1, y1), width=x2-x1, height=y2-y1, linewidth=1.5, edgecolor='r', facecolor='none')
ax.add_patch(rect)

ax.set_axis_off()

fig.savefig(os.path.join('/Users/a1/bigdata09/find-waldo/test_results', img_filename), bbox_inches='tight')
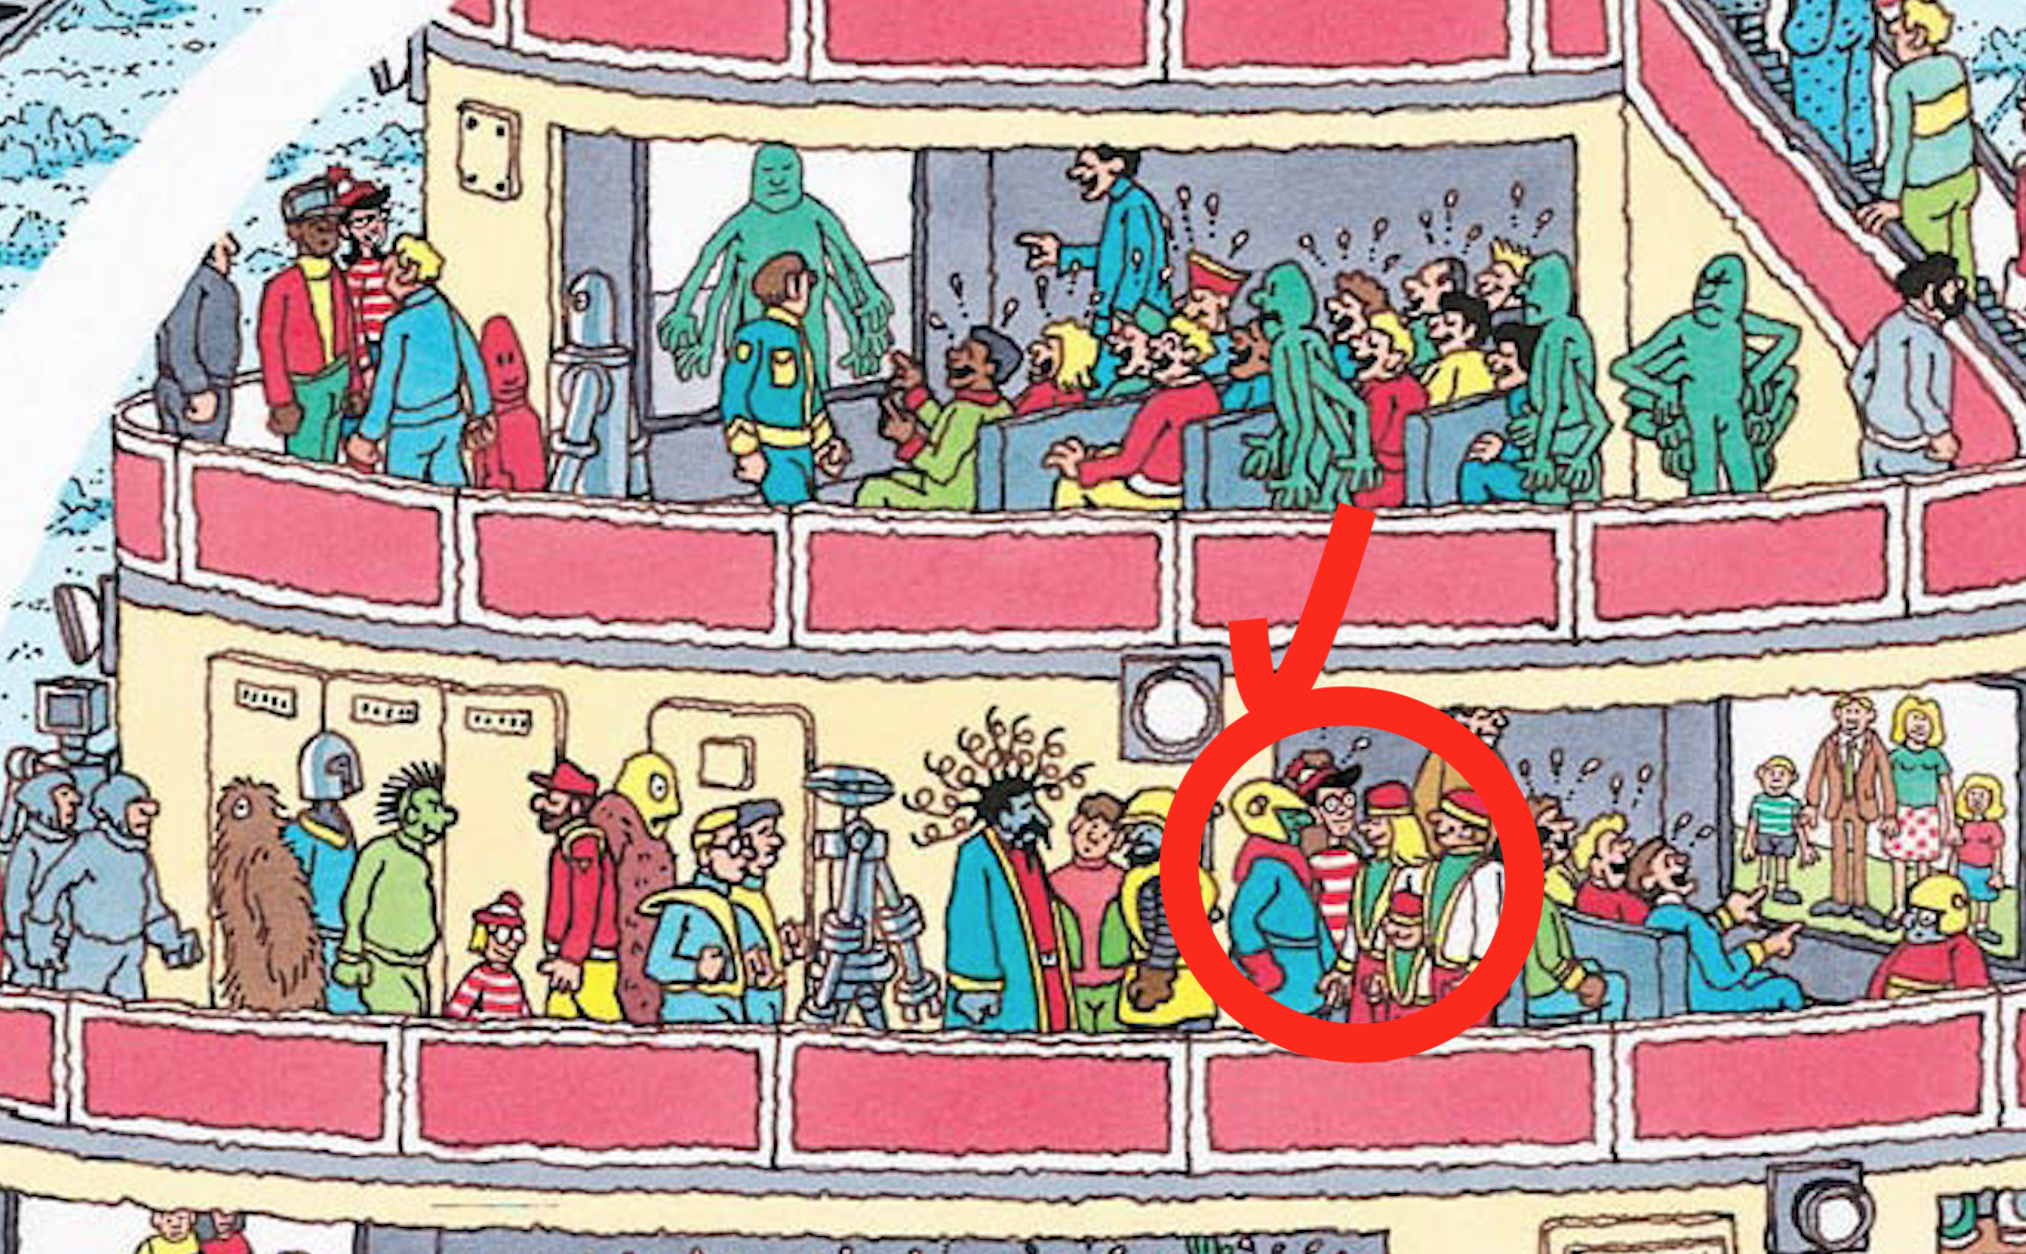
비슷하게 생긴 인물이 여럿 있어서인지 빨간박스가 크게 생김 + 실제 정답은 빨간박스 바로 옆인 문제가 있음. 몇몇 안되는 샘플들을 해결하려면 모델 튜닝이 필요함.

실제 정답…
다른 테스트 사진으로 제대로 찾은 결과 오른쪽 상단에서 월리를 성공적으로 찾아냄.

학습에 필요한 데이터의 수가 부족하고 불균형할 때 2번에서 동적으로 데이터셋을 생성하고(월리가 있는 부분을 랜덤한 사이즈로 여러장 뽑아냄) + 4-1의 방법을 응용하는 것이 학습포인트.


Leave a comment